Welcome to Rongda Machinery Co., Ltd


CALL TO SCHEDULE YOUR FREE!
+8615861110996
sharon@lyrdgj.com
sharon@lyrdgj.com
Toggle Navigation
Intro: Forget Just Scooping Grain - Let's Talk Pellets!
Look, keeping chickens happy and healthy doesn't have to break the bank or cost you hours each week. Lots of farmers – big and small – are switching from plain grain to feed pellets. Why? Because these little nuggets pack a punch. They're easier for your birds to eat, often cheaper per bird in the long run (less waste!), and can seriously help manage feed costs. If you're curious about how feed pellet machines turn stuff like corn into these power-pellets, and how to pick one that fits your coop, you're in the right spot.
From Scattered Grain to Smart Pellets: Why Chicken Farmers Switched
Think about it: tossing whole corn or scratch grains is simple, but how much actually ends up inside your chicken? A fair bit gets scattered, ignored, or wasted. Pellets changed the game. By mashing up the grains, adding protein, vitamins, and minerals, then pressing it all into dense little bites, pellets deliver a balanced diet every mouthful. Your chickens don't pick out their favorite bits and leave the rest. The result? Better nutrition hitting their system, meaning healthier birds, better muscle growth, and honestly, often lower feed bills because less gets wasted or ends up just kicking around the run.
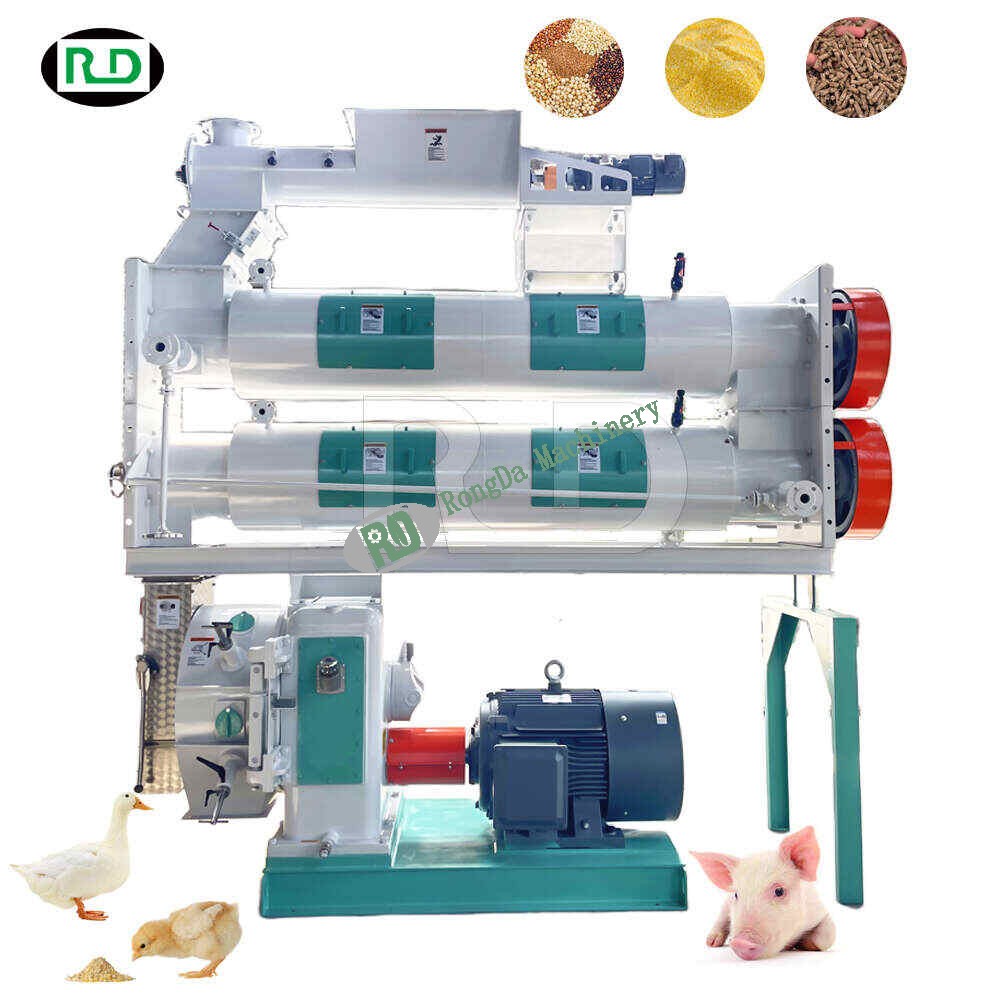
How Does That Feed Machine Turn Mash into Magic? The Pellet Press Explained
So, how does a pellet machine do it? It’s less magic, more clever engineering:
Mix It Up First: You start with your mash – the ground-up mix of grains, supplements, and whatever else your recipe calls for. This goes in the top (the "hopper").
The Squeeze is Key: Inside the machine, this mix gets pushed hard – often by rollers pressing against a metal die (a plate with tons of little holes, like a giant, heavy-duty playdough maker).
Heat & Pressure Cook? Sorta: All that squeezing generates heat. This heat acts like a natural glue, helping the mash bind together under pressure as it gets forced through those die holes.
Out Come the Pellets: Ta-da! What emerges are solid little rods – your feed pellets! Usually, they get chopped or break off naturally to a usable length. Simple? Yep. Effective? Totally.
Picking Your Pellet Press Partner: Hammermill, Planetary, or Auger?
Not all pellet machines are clones. Each type has its strengths. Knowing the differences helps you pick the right tool:
The Hammermill (The Old Reliable): Picture this: a spinning shaft with swinging metal hammers that smash up the raw material before it gets pelletized. It's tough, proven, and often simpler to fix. Great for small to mid-sized setups or if you're using rough stuff. Downside? It adds a step (grinding) and might need more maintenance on the hammers. Think sturdy pickup truck.
The Planetary Pelletizer (The Middleweight Champ): Here, the focus is purely on the pressing. It uses powerful gears and rollers to crush the mix against that die plate we talked about. Pros? It's usually faster than a hammermill-based machine and makes super consistent pellets. Handles a wide mix of ingredients well. Cons? Can be pricier and maybe overkill for a tiny backyard coop. Think reliable SUV.
The Auger Pelletizer (The Efficient Newcomer): Imagine a giant screw slowly forcing the mix forward against that die plate. It’s known for being pretty smooth, efficient with power, and often easier to keep clean. Makes nice uniform pellets quietly. Great choice if you value low fuss and decent volume without going industrial. Think fuel-efficient sedan.
The Bottom Line: Pellet Machines - Win Big, But Know the Trade-offs
The Wins:
Less Waste = More Savings: Birds gobble pellets. Less scattering, less waste in the run.
Better Nutrition Hits the Gut: Formulated pellets mean every bite delivers the diet you planned. No selective feeding.
Scaling Up is Easier: These machines can process serious amounts of feed quickly.
The Downsides:
Upfront Cost: Yep, good machines cost more than a bag of grain at first.
TLC Required: Like any machine, it needs cleaning and regular check-ups (oil this bit, check that belt, keep the die clean!). Skip this, and it will let you down.
Shopping for Your Pellet Press: What Really Matters?
Forget just staring at horsepower numbers for a minute. Think about your actual life:
How Many Mouths to Feed? (Capacity): Got 10 hens or 1000? Match the machine's output (how many pounds it makes per hour) to your flock size. A giant machine for a tiny coop means dust gathering. A tiny one for a big flock means hours stuck feeding the machine.
Space & Power Realities: Where will this beast live? Does it need 3-phase power you don't have? Does it fit through your shed door?
What's Going In? (Feed Mix Matters): Heavy on corn? Adding oats or soy? Different machines handle different grinds and moisture levels better. An auger might handle wetter mixes more easily than a basic hammermill press. Know your recipe.
Can You Fix It? (Service & Parts): This ain't a toaster. Can you get spare parts locally? Is the supplier helpful? A simple design might be easier to fix yourself when something jams (and it probably will... eventually).
Feel It (If You Can): Seriously, if possible, see the contenders in action. Is the operator manual gibberish? Does this machine feel flimsy? Does that one look like it'll still run in 10 years? Your gut feeling matters.
Keeping Your Pellet Machine Purring (Not Groaning)
Listen, keeping this machine happy isn't rocket science, but it is necessary:
Cleanliness is Key: Let wet mash sit? Bad news. It’ll harden like concrete inside. Clean it out properly after each run, especially the hopper and the die area.
Lubrication is Love: Those bearings and gears? Love them back with the right grease or oil, as often as the manual says (or a bit more!). A squeaky machine is a dying machine.
Stop Jams Before They Start: Jams are the enemy! They stress the motor and drive belts, costing you time and money. Prevention? Use dry-enough mix (but not bone dry!), feed it steadily without overloading, keep things lubricated, and adjust the die roller gap if it starts struggling. Check belts for wear – a slipping belt causes havoc